How to Knit a Satchel Bag | Free Knitting Pattern
Whether you are going on an errand run or for casual outings, this satchel bag is designed to fit everything you need on the go. It is a practical addition to any outfit, adding both form and function. Wear it as a shoulder bag, or make the straps longer for a crossbody.
Scroll down for a free pattern of the satchel bag.

Pattern difficulty: 4/5
Materials
200m of bulky-weight yarn for the bag
DK-weight yarn for seaming
A pair of 6mm (US 10) knitting needles
A pair of 5.5mm (US 9) circular knitting needles
A pair of 4.5 mm (US 7) double-pointed knitting needles
D-ring
Notions
Removable stitch markers
Stitch holder
Tapestry needle
Finished measurements
Width: 31cm/ 12.25”
Depth: 4cm/ 1.5”, 8cm/ 3”
Height: 17cm/ 6.75”
Gauge
14 stitches × 23 rows to measure 10cm × 10cm/ 4” × 4” after wet blocking, knitted flat in SS using 6mm (US 10) needles.
If there are too many stitches in your gauge, size your needle up. If there are too few stitches in your gauge, size your needle down.
Techniques used
long-tail cast-on
alternating between knit stitches and purl stitches
knitting and purling through the back loop (k1tbl, p1tbl)
M1L and M1R
Abbreviations
K: Knit (E.g. “K1” = knit 1 stitch)
k2tog: Knit 2 stitches together
M1L: Make 1 left (Pick up the bar in between the two stitches from the front of the bar, knit the stitch through the back loop)
M1R: Make 1 right (Pick up the bar in between the two stitches from the back of the bar, knit the stitch through the front loop)
P: Purl (E.g. “P2” = purl 2 stitches)
p2tog: Purl 2 stitches together
p2togtbl: Purl 2 stitches together through the back loop
Rep: Repeat
RS: Right side (the side that will be shown on the outside)
sl1wyib: Slip 1 stitch with yarn in the back
sl1wyif: Slip 1 stitch with yarn in front
SS: Stockinette stitch (K stitches on the RS, P bumps on the WS)
ssk: Slip, slip, knit (Slip the first stitch knitwise, slip the second stitch knitwise, knit the 2 stitches together through the back loop)
WS: Wrong side (the side that will be on the inside of the bag)

Satchel Bag
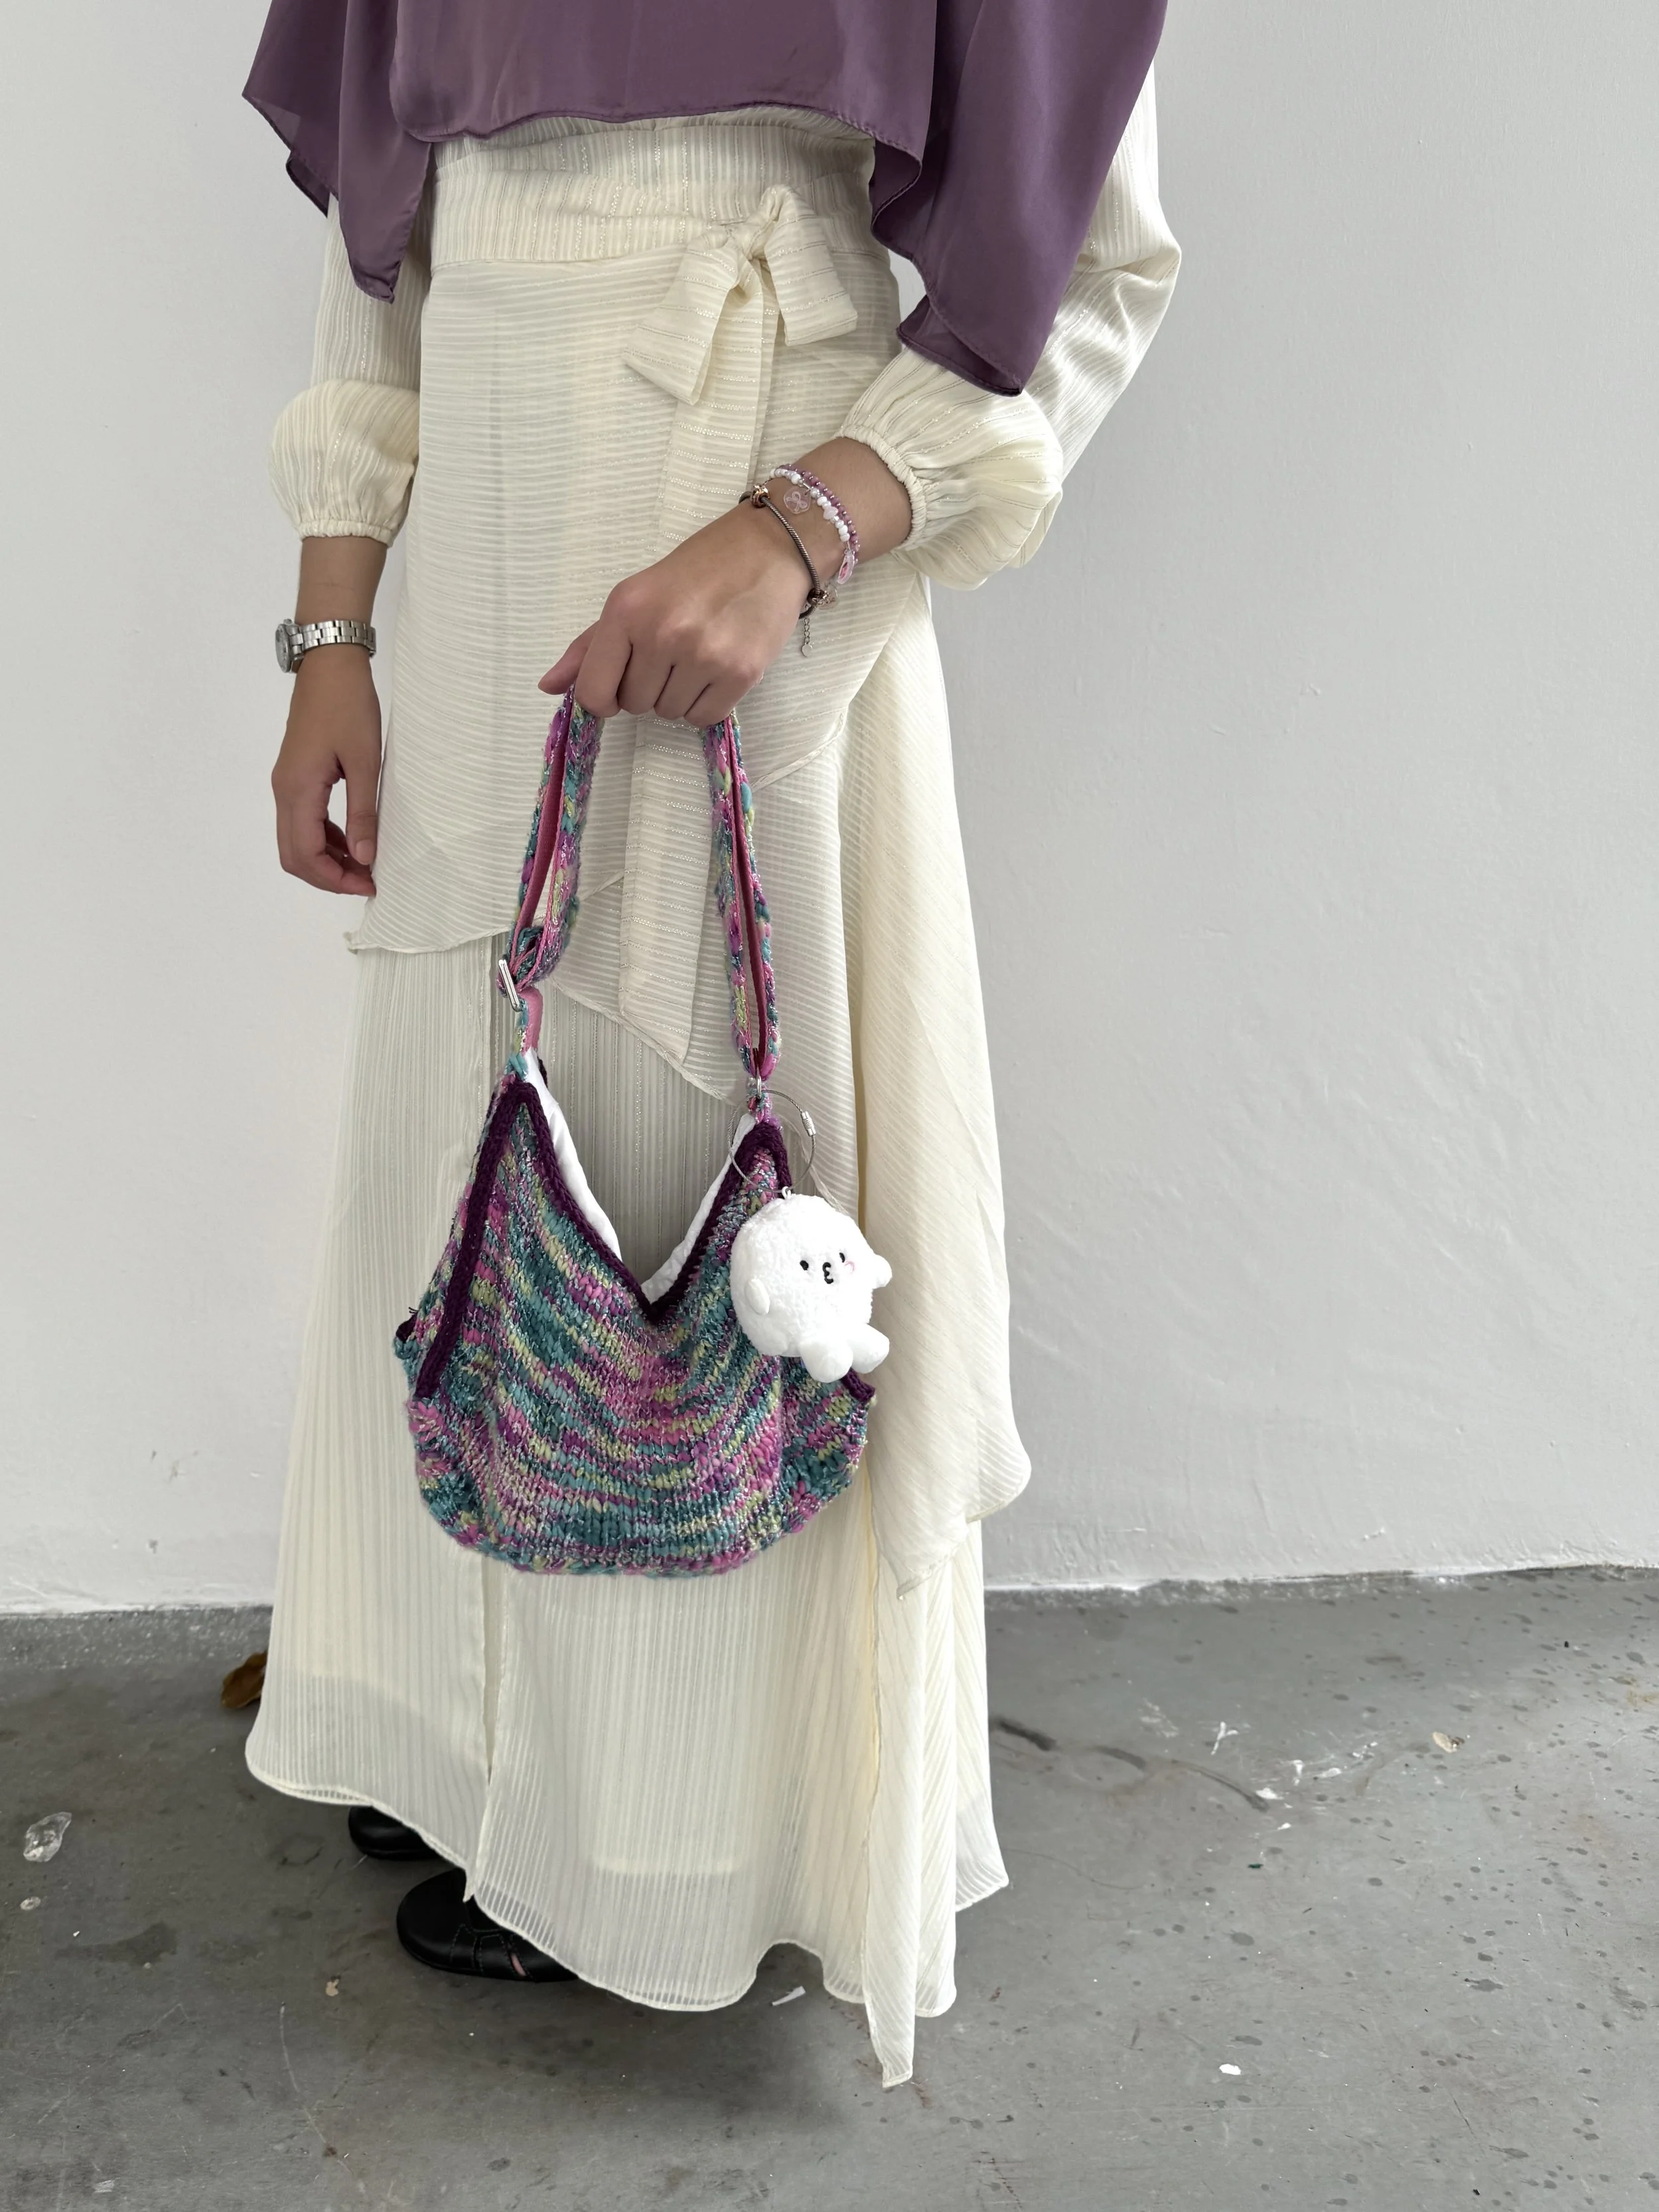
The yarn used to make this bag is Mondial Volare in the colour 0871.
Satchel Bag
Bag panel
Cast on 44 stitches with bulky-weight yarn using the long-tail cast-on method on 6mm (US 10) knitting needles.
K in SS for 36 rows. Cut yarn. Put the stitches on hold.
Rep for a second panel.
Side panel
Cast on 8 stitches with bulky-weight yarn using the long-tail cast-on method on 6mm (US 10) knitting needles.
Row 1 (WS): P to end.
Row 2 (RS): K to end.
Row 3 (WS): P to end.
Row 4 (RS): K to end.
Row 5 (WS): P to end.
Row 6 (RS): K to end.
Row 7 (WS): P to end. Place a removable stitch marker on one of the stitches on this row. This will be used to attach the D-ring later on.
You will start shaping the side panel.
Row 1 (RS): K to end.
Row 2 (WS): P to end.
Row 3 (RS): K to end.
Row 4 (WS): P to end.
Row 5 (RS): K to end.
Row 6 (WS): P to end.
Row 7 (RS): K to end.
Row 8 (WS): P to end.
Row 9 (RS): K2, M1R, K to last two stitches, M1L, K2.
Row 10 (WS): P to end.
Rep Rows 1 to 10 another two more times. You will have 14 stitches in total.
K in SS for another 6 rows. The side panel will now be referred to as the base panel. Work the base panel.
Base panel
You will work the base panel while joining it together with the two bag panels.
On the left needle of the 5.5mm (US 9) knitting needles, transfer the first bag panel from the stitch holder with the RS facing up. Transfer the base panel from the 6mm (US 10) knitting needles onto the same 5.5mm (US 9) knitting needles. Ensure that they are both on the RS.
On the right needle of the 5.5mm (US 9) knitting needles, transfer the second bag panel from the stitch holder with the RS up.
All three panels should be facing the RS.
Hold the needles such that the left needle has the bag panel and the base panel, and the right needle has the bag panel. You will start working on the base panel first.
Row 1 (RS): K2, M1R, K to last two stitches, M1L, K2.
Row 2 (WS): Transfer one stitch from the right needle onto the left needle. p2togtbl, P14, p2tog. Turn work.
Rep Rows 1 and 2 until you’ve joined all the base stitches with the bag panel stitches.
The base panel will now be referred to as the side panel. Work the side panel.
Side panel
Change to 6mm (US 10) knitting needles. K in SS for 6 rows.
Row 1 (RS): K2, ssk, K to last two stitches, k2tog, K2.
Row 2 (WS): P to end.
Row 3 (RS): K to end.
Row 4 (WS): P to end.
Row 5 (RS): K to end.
Row 6 (WS): P to end.
Row 7 (RS): K to end.
Row 8 (WS): P to end.
Row 9 (RS): K to end.
Row 10 (WS): P to end.
Rep Rows 1 to 10 another two more times. You will have 8 stitches in total. Place a removable stitch marker on one of the stitches on the last row.
Strap
SS strap
If you are planning to line your strap, simply K in SS until you reach the desired length for the strap. Then bind off.
Linen stitch strap
If you are not intending to sew a lining for the strap, a linen stitch strap would be more durable.
Row 1 (RS): K2, *sl1wyif, K1 rep from * to end.
Row 2 (WS): P2, *sl1wyib, P1 rep from * to end.
Rep Rows 1 and 2 to work the linen stitch until you reach the desired length for the strap. Then bind off.
Block the bag if you wish to shape it. Then proceed to seam it together.
Seaming the bag
You will seam the panels together using an applied I-cord edge.
Temporarily attach the panels together using removable stitch markers.
Cast on 3 stitches with DK-weight yarn using the long-tail cast-on method on 4.5mm (US 7) double-pointed needles.
Starting from the bottom of the bag and using the same needle, insert it into the two panels.
Step 1: Pick up 1 stitch.
Step 2: Move the stitches to the other end of the needle.
Step 3: K2, k2togtbl.
Rep Steps 1 to 3 until you’ve joined the panels together. When you reach a corner, work the applied I-cord edge three times in the same stitch before working the next stitch. Bind off when complete.
Seaming the strap
Insert the strap into the D-ring. Fold it down and sew the two sides of the strap together.
Insert the side panel into the other end of the D-ring. Fold it down until you reach the stitch marker and sew the two sides of the side panel together.
Weave in any loose ends to finish.
Your bag is complete!
If you share your finished works on Instagram, please tag me @daylightsbynurin. I’d love to see and share your posts.
This pattern is for personal use only. Please do not sell finished items made using this pattern, however you may gift the final product. Thank you.